(NOTE: This post was originally published on July 15, 2015. The information here is still relevant, though Facebook has made it easier to do basic dark posts.)
...
Those of us who live on social media for a living can tell you with utter despair that trying to get traction with organic Facebook posts is a serious chore. Facebook's algorithm EdgeRank decides which stories appear in each user's newsfeed. The idea is that it's better for the user in that it hides boring stories, so if your story doesn't score well, no one will see it. Great for users. A nightmare for some marketers.
For savvy ones, it's only a minor inconvenience.
For a couple years months, I've been experimenting with Facebook "Dark Posts" to help a client who has a national audience do some specific targeting for their product. Dark Posts, for those of you who are unaware, are posts that don't show up in your timeline, but are targeted to allow you to showcase your brand to a specific ad set. The idea here is that you can create a few dozen posts in one day without completely annoying your fans and still seek to expand your circle of fans in a targeted way.
(Keep in mind that if you are one of those people who are clueless when it comes to Facebook Ads, then this post probably isn't for you. You might want to open an ads account and try a few for the pages you serve just to get the hang of it.)
Anyway, just because you're awesome and not enough people actually do this, I thought I'd share a little step-by-step process for a fictional download that I would be offering to a target audience of restaurant owners in Iowa. Here goes...
1. Go to Power Editor. Go to the "Manage Ads" section from the right dropdown arrow on the main page of Facebook. Once you get there, click on "Power Editor."
2. Click on "Create Post."
3. Create your unpublished page post, aka "Dark Post." When the window pops up, fill in the necessary information. Go for a catchy headline aimed at the audience you're trying to reach. Be specific and exciting, but keeping in mind your audience. When you add an image to this post, and this is very important, make sure the image has 20% or less of text. Facebook denies ads that have more than 20%. To be on the safe side, I never use more than 5-10% of the space for text. Make sure the radio button is highlighted that says "this post will only be used as an ad."
4. Cut and paste the ad ID. From here, you'll want to cut and paste the little number that shows up next to your ad.
5. Create your ad. Go back to the ads manager and click "Create Ad."
6. Click on "Boost Your Post."
7. Enter your post URL number. Here's where you'll be able to take the number that you cut and pasted from the Power Editor and plug it into the line where it says "Choose page or enter its URL." You can see that the number I entered here is the same from the dark post I just created.
8. Target your ads. Try to be as specific as possible and play around with this until your audience is a manageable size. You'll notice that for my purposes here, my audiences were too small, so I went ahead and added two additional states. Notice how I was able to filter down to state, industry, interests and job title.
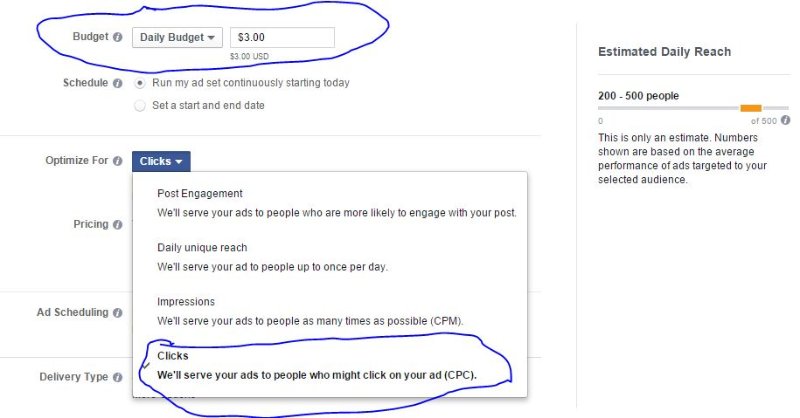
When testing these ads out, I make sure to get the most bang for my buck by focusing on "Clicks" and a relatively small budget (for me, that's $1-3). After I create about two dozen or so of these ads, I'm able to get a pretty good feel for which ad types and demographics work the best, but you'll have to find this out through trial and error.
9. Place your order and evaluate. From there, Click "Place Order" and then wait for Facebook to approve it. Let these ads run for 4-5 days and then go back and evaluate their effectiveness. You might run variations on the most effective ones until you figure out the best possible formula.
Thanks for listening. If you have any questions, feel free to shoot me a message, or write a suggestion or question in the comments here. Happy dark posting!
****


